Fix Windows Sound Device Problem

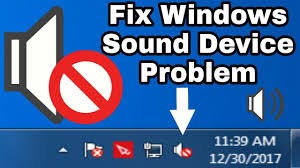
Sound issue is most common problem in Windows. Sometime if you play any game, video or any other in full screen mode the problem may be happen. For resolving this problem you must restart your PC. And another problem is that your PC is not playing any media file, games or any other for sound driver problem. So you need to update your driver for resolving bug. So let’s start

sound-driver-problem.webp


Online Method
You can download sound driver from windows update. There you will get official sound driver.
If you aren’t install any sound driver you can download and install sound driver from Windows Update.
If you already install sound driver, want to update it, go to ‘Device Manager’ with administrator permission. Under ‘Sound video and game controller’ you will get your sound driver. Right click on your sound driver and press ‘Uninstall’ Button. Then enable this option ‘Delete this driver from system’ and press ‘Uninstall’. Now Restart your PC. Then update your driver from Windows update.


Offline Method
For offline method you must download official sound driver files. You can also download sound drivers file from below link.


How to Install Sound Driver?
Extract the archive to your desktop named ‘MEDIA’
Open ‘Control Panel’ and go to ‘Devices and Printers’
Open your PC and click on ‘Hardware’
Double click on ‘Multimedia Audio Controller’ (Only for those windows whose don’t have any sound driver)
Click On ‘Update Driver’
Then choose ‘Browse my computer for driver software’
Click on ‘Browse’ button and choose your ‘MEDIA’ folder which is located on your desktop
Press Ok button and Next button.
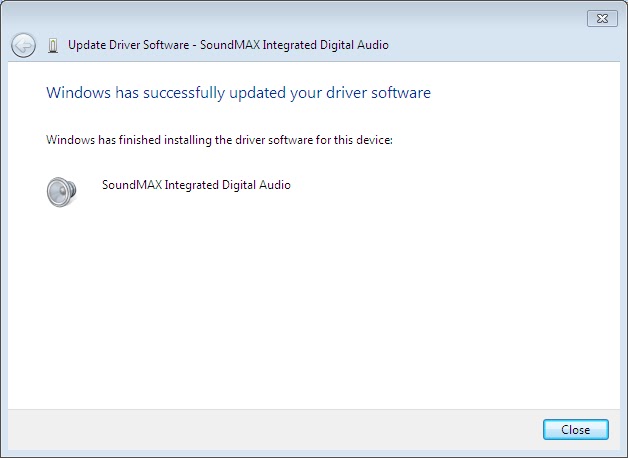
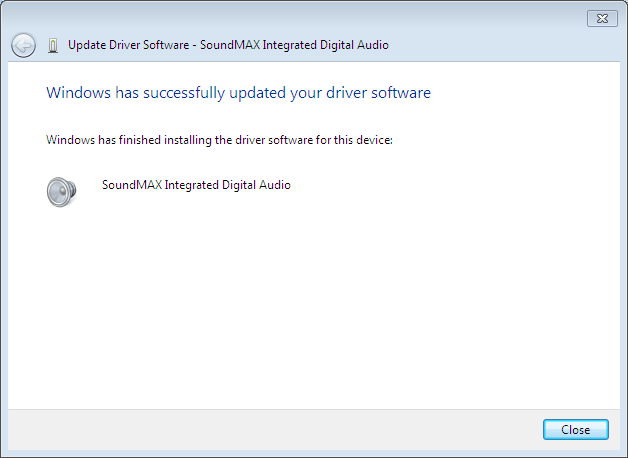
Wait until you don’t see this message ‘Windows has finished installing the driver software for this device’

installing-sound-driver.webp

Download YouTube videos in .mp4, .avi extention (For mobile & PC users)

Today YouTube is a best online media for online music, gaming, technology, news, sports etc. About 5 billion videos are watched in YouTube everyday. But main problem is that, if you download any video the video saved in to YouTube. The video will not save in to your memory(in video format). For watching this video you must goto YouTube>Library>Downloads. If you clear YouTube data from setting your YouTube videos will be lost. So we need to download the video into Phone memory.

fighting-for-youtube.webp


How to download YouTube video in to my Phone Memory?

   You can download YouTube video only 2 step

  1. With Software
  2. Without Software


1. With Software method

    You can download YouTube video using a mobile app named Videoder Video Downloader. This method is too easy. Just open YouTube, click on share button and click on Download Video with Videoder.


    videoder-premium.webp


    Download Videoder Video Downloader(Premium) free by clicking below download now button.


    2. Without Software method (Recommended for Advanced users)


    If you want to download YouTube Video without any software (Recommended for PC) you can follow this method.


    alan-walker-k391.webp


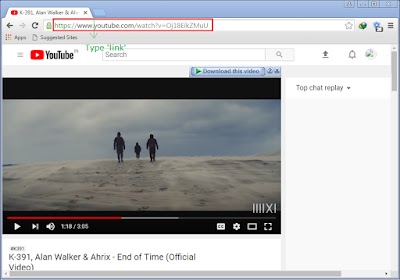
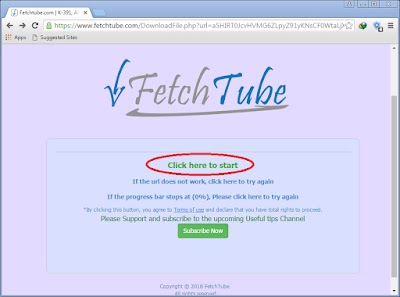
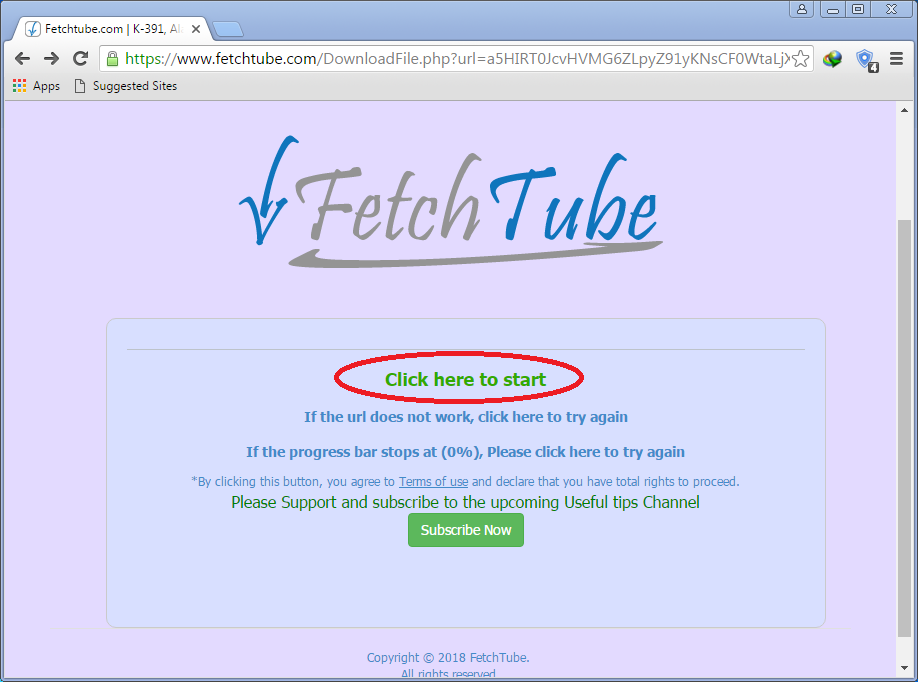
               At first open the video into your browser (You can copy YouTube video link into your browser). Select the url and type ‘link’ before ‘youtube.com’ and go to the link.Then you will be reached to ‘FetchTube.com’. There you will get a button name ‘Load Options’ click on that. After few seconds there you will get download link of MP4, webcam, mp3(for download mp3 click on the ‘Listen’ button). After choosing your destination link, click on ‘Click here to continue’ link. After few seconds you will get a button ‘click here to start’. click on that and wait until the progress bar reached to 100%. Then your download will be start automatically.


    fetchtube.webp


    But FetchTube doesn’t support many format videos and can’t support subtitles. So I recommended to use Videoder.

    Introduce Yourself (Example Post)

    This is an example post, originally published as part of Blogging University. Enroll in one of our ten programs, and start your blog right.

    You’re going to publish a post today. Don’t worry about how your blog looks. Don’t worry if you haven’t given it a name yet, or you’re feeling overwhelmed. Just click the “New Post” button, and tell us why you’re here.

    Why do this?

    • Because it gives new readers context. What are you about? Why should they read your blog?
    • Because it will help you focus you own ideas about your blog and what you’d like to do with it.

    The post can be short or long, a personal intro to your life or a bloggy mission statement, a manifesto for the future or a simple outline of your the types of things you hope to publish.

    To help you get started, here are a few questions:

    • Why are you blogging publicly, rather than keeping a personal journal?
    • What topics do you think you’ll write about?
    • Who would you love to connect with via your blog?
    • If you blog successfully throughout the next year, what would you hope to have accomplished?

    You’re not locked into any of this; one of the wonderful things about blogs is how they constantly evolve as we learn, grow, and interact with one another — but it’s good to know where and why you started, and articulating your goals may just give you a few other post ideas.

    Can’t think how to get started? Just write the first thing that pops into your head. Anne Lamott, author of a book on writing we love, says that you need to give yourself permission to write a “crappy first draft”. Anne makes a great point — just start writing, and worry about editing it later.

    When you’re ready to publish, give your post three to five tags that describe your blog’s focus — writing, photography, fiction, parenting, food, cars, movies, sports, whatever. These tags will help others who care about your topics find you in the Reader. Make sure one of the tags is “zerotohero,” so other new bloggers can find you, too.

    Protect your sensitive files from unwanted visitors

    In this tutorial I tell you how to lock a folder for stop access personal files from unwanted visitors. So let’s start,


    Necessary tools (Click to download):


    Step-1

    At first install WinRAR.exe (if you already install WinRAR you can skip this step.)


    After install WinRAR it may work for 40 days, so I recommended you Active WinRAR by clicking here.


    Step-2

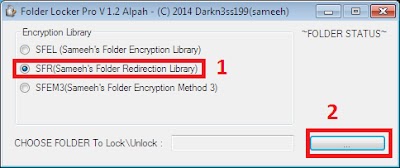
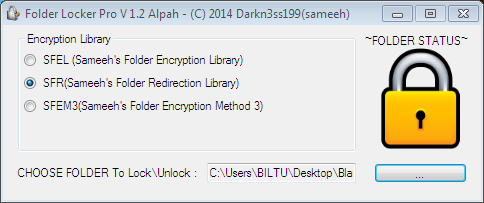
    Open ‘Folderlocker.rar’ (Password – Unknown Author). Extract ‘Folder lock Windows’ and open it. Launch ‘FolderProtection.exe’. In the left side, choose Encryption Library to SFR (Sameeh’s Folder Redirection Library) and click on the browse button to choose folder.

    folder-lock-screenshot1.webp


    After choosing folder type your Password and confirm that and Press Okaybutton.


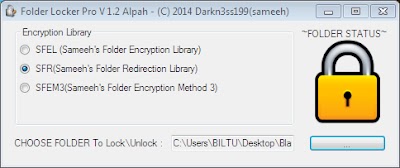
    If you see lock icon on this page, you can sure that your files are locked safely.


    folder-lock-screenshot2.webp


    When you open the locked folder (I have choose the folder ‘Blank’), you can see that the folder is changed to ‘Recycle Bin’. Anyone can’t realized that the folder have personal files, because it looks and works like Recycle Bin.


    Step-3

    Keep this folder into your Root Directory (C:, D:) on your hard disk. Rename the folder to ‘recycle_bin{Random number}’ (without Bracket).


    Step-4(Hide the folder and set the folder to system folder)

    Go to Start menu> All Programs> Accessories click on ‘Command Prompt’. Type attrib +s +h and drag and drop the locked folder in to Command Prompt window and give enter.


    Step-5(How to view the locked files)

    Go to Start menu and search ‘Folder Options’ and open Folder Options. Click on View Menu; choose ‘Show hidden files, folders, and drives’ & uncheck the check box ‘Hide protected operating system files (Recommended)’ and press ‘Yes’ button, press ‘Ok’ button.


    Open ‘FolderProtection.exe’ and browse the folder and press Ok button. Type your password and Press Okay button. When you see Unlock icon on the Application, you can access your protected personal files.

    Shortcut Virus : Remove from PC and stop reinfecting

    What is Shortcut Virus?

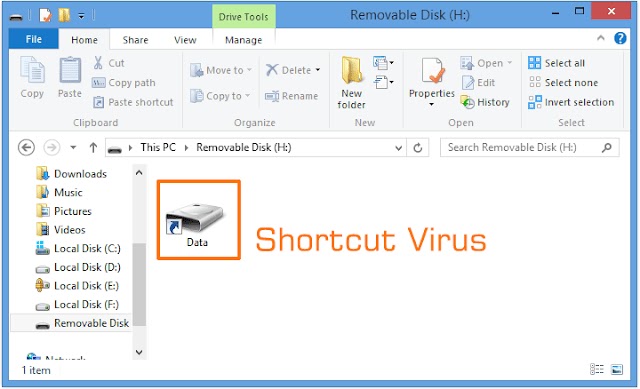
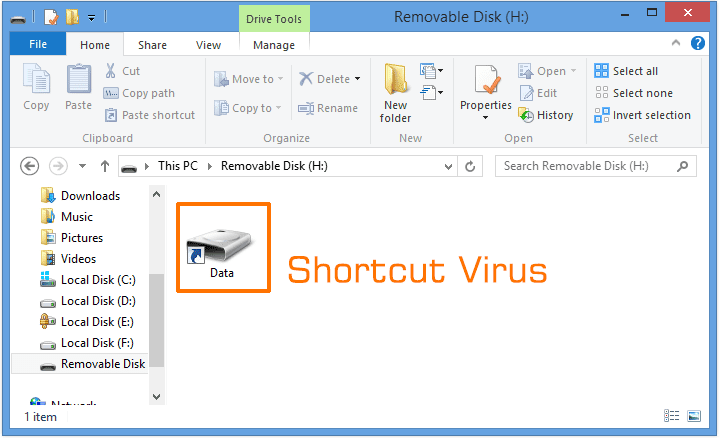
    A shortcut virus is a kind of Trojan/worm combination that hides all of your files and folders, then replaces them all with shortcuts that look exactly the same.

    When you launch one of these false shortcuts, you end up running malware that duplicates the virus and further infects your system, leading to stolen personal data, worsened system performance, and all kinds of other malware-related side effects.

    Shortcut viruses mainly affect physical file transfer devices like USB flash drives, external hard drives, and SD memory cards, but can be transferred to computers when exposed to an infected device that takes advantage of Autorun or Autoplay in Windows.

    shortcut-virus.webp


    Many shortcut viruses remain undetected by antivirus software, so running a security suite with virus scanner usually isn’t enough.


    How to remove Shortcut Virus?

    You can remove shortcut virus permanently using this tool :


    Before you begin, you must launch your PC in safe mode

    After using Shortcut Virus Remover use Avast Antivirus to clean infected exe file

    Launch Avast Antivirus then run full scan(It may take few hours to complete, depends on your system).

    Download Latest Avast Antivirus here


    After Scan complete check Virus Chest.

    At first repair these files. Then you manually check which files are corrupt. Delete these corrupt files. These files are can’t be recovered because Shortcut Virus has infected these files. If you launch these files. Your PC may begin to infected Shortcut Virus. So I recommend you to delete these files. The Shortcut Virus only attack on Application Software. The virus can’t attack in archive file and System files. 


    Windows 7 Full version (Untouched ISO)

    About Windows 7


    Windows 7 is a personal computer operating system that was produced by Microsoft as part of the Windows NT family of operating systems. It was released to manufacturing on July 22, 2009, and became generally available on October 22, 2009, less than three years after the release of its predecessor, Windows Vista. Windows 7’s server counterpart, Windows Server 2008 R2, was released at the same time. Microsoft ended mainstream support for Windows 7 on January 13, 2015, but extended support will not end until January 14, 2020.

    Windows 7 was primarily intended to be an incremental upgrade to Microsoft Windows, intended to address Windows Vista’s poor critical reception while maintaining hardware and software compatibly. Windows 7 continued improvements on Windows Aero (the user interface introduced in Windows Vista) with the addition of a redesigned taskbar that allows applications to be “pinned” to it, and new window management features. Other new features were added to the operating system, including libraries, the new file sharing system HomeGroup, and support for  multitouch input. A new “Action Center” interface was also added to provide an overview of system security and maintenance information, and tweaks were made to the User Account Control system to make it less intrusive. Windows 7 also shipped with updated versions of several stock applications, including Internet Explorer 8, Windows Media Player, and Windows Media Center.


    windows-7-original.webp


    In contrast to Windows Vista, Windows 7 was generally praised by critics, who considered the operating system to be a major improvement over its predecessor due to its increased performance, its more intuitive interface (with particular praise devoted to the new taskbar), fewer User Account Control popups, and other improvements made across the platform. Windows 7 was a major success for Microsoft; even prior to its official release, pre-order sales for 7 on the online retailer Amazon.com had surpassed previous records. In just six months, over 100 million copies had been sold worldwide, increasing to over 630 million licenses by July 2012. As of November 2019, 27.98% of traditional PCs running Windows are running Windows 7 (and thus 22% of all traditional PCs), which still has over 60% market share in some countries.


    System Requirements


    GHz:  1 gigahertz (GHz) or faster
    Ram: 1 GB RAM (32-bit)
              2 GB RAM (64-bit)
    Hard Disk Space : 16 GB (32-bit)
                               20 GB (64-bit)

    Download Links


    Download Rufus

    Product Keys

    RHTBY-VWY6D-QJRJ9-JGQ3X-Q2289
    V77DJ-CT8WB-Y3GXT-X3FBP-6F987
    JC7BV-94FD2-D86PH-XRMHR-BXKDG
    RFQ4X-89FJ8-6BHJQ-RC8QJ-F2P2K
    MVYTY-QP8R7-6G6WG-87MGT-CRH2P
    MM7DF-G8XWM-J2VRG-4M3C4-GR27X
    RGQ3V-MCMTC-6HP8R-98CDK-VP3FM
    7YWX9-W3C2V-D46GW-P722P-9CP4D

    These Product keys doesn’t work anymore.

    Try Windows Activators for Activating Windows.

    Riffstation Pro 2017 download (End of update)

    In today Riffstation is an great tool for guitar players. It can Extract chord from music files, fix music chord errors and many more features. In internet, you get Riffstation Trail that some features has turned off. And Riffstation Crack is good but some malicious people used that for infecting virus. So I recommend you to do not use crack.


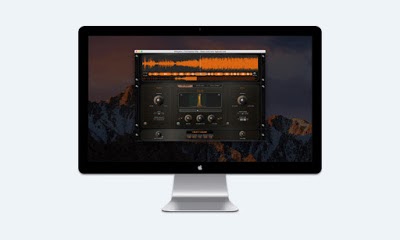
    riffstation-pro.webp


    This is 100% original Riffstation Pro last version of Sonic Ladder. (Sonic ladder has stopped making Riffstation)


    Download Link : Riffstation Pro Download Last Version


    Design a site like this with WordPress.com
    Get started